How to Choose Solar Pathway Lights for Outdoor Use?
Choosing Solar Pathway Lights Outdoor requires more than comparing brightness and price. A reliable selection balances sunlight, battery capacity, weather resistance, safety, and installation conditions. The U.S. Department of Energy reports that LED products use at least 75% less energy and can last up to 25 times longer than incandescent lighting. This advantage supports solar lighting, but performance still depends on proper system design.
Real outdoor conditions can be unforgiving. A light placed beneath a tree may receive only scattered sunlight. A narrow pathway may need wider beam distribution, not simply higher lumens. The International Electrotechnical Commission’s IEC 60529 standard provides the familiar IP rating framework for protection against dust and water. For exposed gardens, an appropriate IP rating matters. Check the battery enclosure, cable seals, and housing joints carefully.
Small details matter.
Industry guidance from the U.S. Department of Energy also emphasizes that lighting quality involves visibility, glare control, and color appearance. Therefore, examine color temperature before installation. Warm white light can make stone paths feel inviting, while cooler light may reveal steps more clearly. Yet brighter is not always safer. Excessive glare can reduce visibility and disturb nearby homes or wildlife. Product claims can sound impressive, but field results may vary. Battery aging, winter cloud cover, and poor positioning are easy to underestimate. This guide explains how to assess Solar Pathway Lights Outdoor with practical criteria, credible standards, and realistic expectations. No model performs perfectly everywhere. The best choice fits the path, climate, and maintenance routine.
Measure Sun Exposure and Path Layout Before Choosing Solar Lights
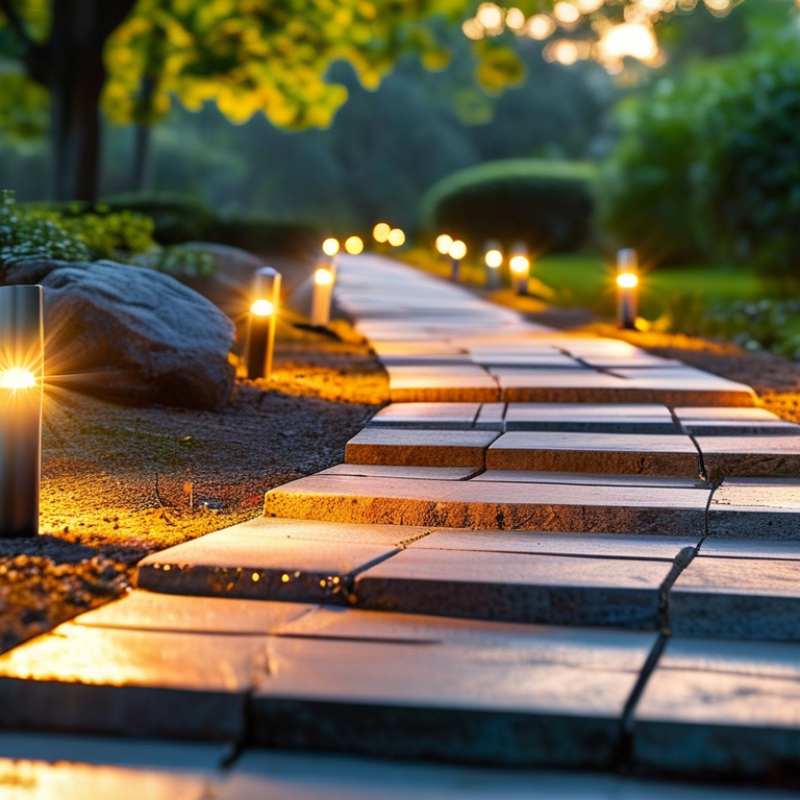
Before choosing solar pathway lights, measure sunlight along the actual installation route. A bright patio at noon may become shaded by a wall or tree later. Walk the path at 9 a.m., noon, and 3 p.m. Record where direct sunlight reaches the ground. Most solar lights perform better with six to eight hours of direct exposure. Reflected light is usually weaker. Cloudy days expose weak planning. Do not guess.
Sketch the path and mark its length, width, steps, bends, and drainage areas. Measure spacing rather than placing lights by eye. Lights set about six to eight feet apart often create steady guidance, but narrow paths may need wider spacing. Keep fixtures away from areas where feet, lawn equipment, or heavy rain could damage them. A north-facing section may need a different position than a south-facing section. Check the panel angle too. It should face the strongest available sunlight, not simply point toward the path.
Test one temporary light for several evenings before buying a full set. Watch its brightness after sunset and again before dawn. My first rough layout looked balanced, but the final bend remained too dark. That mistake changed the spacing. Choose enough brightness for safe visibility, without creating glare near windows. Consider warm or neutral light, sealed construction, replaceable batteries, and stable stakes. Weather resistance helps, but it cannot fix poor sun exposure.
Compare 10–100 lm Output, 2700–3000 K Color, and 80+ CRI
Choosing solar pathway lights starts with the scene, not the product photograph.
For a narrow garden path, 10–30 lumens can mark each step without creating glare. Wider paths, dark driveways, or uneven paving may need 50–100 lumens per fixture. These ranges are practical comparisons, not universal rules. A bright lamp can still feel unsafe when spaced poorly.
Color temperature changes the garden’s mood.
The U.S. Department of Energy’s Solid-State Lighting reports identify 2700–3000 K as warm-white lighting, commonly preferred for residential comfort. Warmer light preserves a softer appearance around plants, brick, and timber. Cooler light may reveal more contrast, but it can make foliage look harsh.
I would test one lamp after sunset. Product photos mislead.
Color rendering deserves equal attention.
The Illuminating Engineering Society treats CRI as a useful color-quality indicator, although it does not describe every visible color perfectly. Choose 80+ CRI when flowers, stone, or painted surfaces should look natural. The DOE Lighting Facts program also lists lumens, CCT, and CRI as key comparison data.
Remember that a rated 100 lumens may describe a fully charged battery. The U.S. Department of Energy’s solar resource data shows sunlight varies by season and location, so winter performance can disappoint.
A smaller light used consistently may outperform a brighter one that fades before midnight. There is no perfect setting.
Match 6–8 Hours of Charging to an 8–12 Hour Runtime
How to Choose Solar Pathway Lights for Outdoor Use?
A reliable solar pathway light should collect six to eight hours of charging sunlight. That energy should support eight to twelve hours of nighttime operation. In practical outdoor checks, direct midday light matters more than bright but brief morning light. Place the panel where trees, walls, and roof edges cannot shade it. Even partial shade can reduce evening brightness.
Check whether the advertised runtime uses the lowest brightness setting. Many lights achieve twelve hours only under ideal laboratory conditions. A cloudy day, winter angle, or dusty panel may shorten that performance. Choose a model with a suitable battery capacity and a panel that faces open sky. The light should also include automatic dusk activation and overcharge protection. Test the location for one full day before installing several units.
Brightness needs careful judgment. A pathway usually needs gentle guidance, not harsh glare. Warm light can make stone edges and garden borders easier to see. Keep fixtures spaced evenly, so one bright pool does not sit beside a dark gap. I once underestimated shade from a small tree; the lights looked fine at sunset but weakened before midnight. That mistake showed why real site conditions matter more than attractive specifications. Recheck the panels after rain, falling leaves, and seasonal growth. Small details affect charging.
How to Choose Solar Pathway Lights for Outdoor Use? - Match 6–8 Hours of Charging to an 8–12 Hour Runtime
| Selection Dimension | Recommended Specification | Typical Outdoor Range | Why It Matters | What to Check Before Purchase |
|---|---|---|---|---|
| Solar Charging Time | 6–8 hours of direct sunlight | 4–8 hours, depending on season, latitude, shade, and weather | Provides enough energy for the battery to power the light through the evening and overnight. | Place the panel where it receives unobstructed sunlight, preferably away from trees, walls, and roof overhangs. |
| Nightly Runtime | 8–12 hours | 6–12 hours under normal operating conditions | An 8–12-hour runtime can cover dusk, evening use, and early-morning hours when the light is fully charged. | Look for runtime claims based on a full charge and check whether reduced brightness or low-power mode is used. |
| Light Output | 15–50 lumens per pathway light | 5–100 lumens for common residential pathway products | Produces enough light to outline a walkway without creating excessive glare or disturbing nearby areas. | Use lower output for decorative edging and higher output for steps, slopes, or areas requiring clearer visibility. |
| Solar Panel | Monocrystalline or polycrystalline panel with a practical surface area | Approximately 0.5–2.0 watts for many compact pathway lights | A larger or more efficient panel generally collects more energy in limited sunlight, although performance still depends on orientation and weather. | Confirm that the panel faces the brightest part of the sky and is not permanently shaded by the fixture or surrounding plants. |
| Battery Capacity | Rechargeable battery sized for one full night of operation | Approximately 600–2,200 mAh for many small pathway lights | Battery capacity affects how long the light can operate after charging and how well it handles partly cloudy days. | Check the battery type, replacement availability, rated voltage, and whether the capacity is specified for the included battery. |
| Battery Chemistry | Ni-MH for common low-cost designs; lithium-based cells for compact, higher-energy designs | Ni-MH, lithium-ion, or lithium iron phosphate depending on the product design | Battery chemistry influences energy density, cold-weather performance, service life, and charging behavior. | Choose a battery designed for outdoor temperature conditions and follow the manufacturer’s replacement and disposal instructions. |
| Weather Resistance | IP44 minimum; IP65 or higher for exposed locations | IP44–IP67 in outdoor pathway lighting | Ingress protection indicates resistance to solid particles and water. Higher ratings are more suitable for rain, sprinklers, and exposed placement. | Check the complete fixture rating, including the housing, switch, battery compartment, and cable connections. |
| Operating Temperature | A range suitable for the local climate, commonly about −20°C to 45°C | Approximately −20°C to 50°C, depending on the battery and electronics | Temperature affects battery capacity, charging speed, material durability, and the ability to maintain the stated runtime. | For freezing climates, verify cold-weather compatibility and expect shorter runtime during very low temperatures. |
| Color Temperature | 2,700–3,500 K for a warm, comfortable appearance | 2,700–6,500 K | Warm light blends well with gardens and residential settings, while cooler light can appear brighter and more task-oriented. | Choose a warmer color temperature near bedrooms and seating areas to reduce glare and maintain a relaxed atmosphere. |
| Light Distribution | Downward or diffused illumination | Diffused, downward, 360-degree, or directional patterns | Downward and diffused designs help illuminate the path while reducing direct glare for pedestrians and neighbors. | Review product images or beam information to ensure the light covers the walkway rather than shining into people’s eyes. |
| Spacing Between Fixtures | 1.5–3 m between lights for continuous pathway coverage | 1–4 m, depending on lumen output and beam angle | Closer spacing creates more even illumination; wider spacing can work for decorative marking or brighter fixtures. | Test one or two lights at night before installing the complete row, especially on curved or uneven paths. |
| Automatic Control | Built-in dusk-to-dawn sensor with an accessible on/off switch | Light sensor, timer, motion sensor, or combined control | Automatic control turns the light on at night and prevents unnecessary daytime operation. | Keep the sensor clear of nearby artificial light sources, which may delay activation or cause the light to switch off. |
| Installation Method | Ground stake with stable housing and adjustable height | Push-in stake, base-mounted, or wall-mounted designs | A stable installation keeps the panel correctly oriented and helps prevent tilting, water pooling, or accidental damage. | Install in firm soil without forcing the stake through hard ground; use a base-mounted model for paving or compacted surfaces. |
| Maintenance Requirement | Clean the panel periodically and inspect seals seasonally | Light cleaning every few weeks to several months, depending on dust and pollen | Dirt, leaves, and bird deposits reduce solar energy collection and can shorten the nightly runtime. | Use a soft, damp cloth and avoid abrasive cleaners that can scratch the panel or damage the protective surface. |
| Best Use Case | Walkway marking, garden borders, steps, and low-level orientation lighting | Decorative to functional outdoor guidance | Solar pathway lights are most effective where modest, evenly distributed illumination is needed without underground wiring. | For security lighting or detailed task lighting, consider a higher-output wired or dedicated motion-activated system. |
Practical guideline: select a fixture that can receive approximately 6–8 hours of unobstructed charging sunlight and is rated to provide about 8–12 hours of operation after a full charge. Actual performance varies with season, weather, panel orientation, temperature, battery age, and installation conditions.
Verify IP65+ Weather Protection Under IEC 60529 Standards
How to Choose Solar Pathway Lights for Outdoor Use?
When choosing solar pathway lights, inspect the IP rating before comparing brightness or battery size. Under IEC 60529, IP65 means complete dust protection and resistance to water jets from any direction. It does not mean the light can survive flooding or immersion. That distinction matters beside lawns, drainage channels, and low garden walls.
Look for a clear IP65, IP66, or IP67 marking on the product and its packaging. Ask for test documentation that references IEC 60529, rather than trusting vague words like “waterproof.” IP ratings apply to the tested enclosure, not always the entire installation. A loose cap, damaged gasket, or poorly sealed charging port can reduce protection quickly. Check these areas before placing the light outdoors.
Higher is not automatically better. IP67 can handle temporary immersion, but it may still need protection from strong sunlight, freezing temperatures, and physical impact. IEC 60529 does not fully measure UV resistance or long-term corrosion. I would also examine the lens seal after several weeks of rain. Condensation inside the housing is a warning sign. It may indicate hidden leakage, even when the label looks reassuring. One detail is easy to miss: installation can matter as much as the rating. Keep connectors above standing water, avoid sinking the housing into wet soil, and clean blocked drainage paths around the fixture.
Set 1.8–3 m Spacing and Select a Low-Glare Beam Angle
How to Choose Solar Pathway Lights for Outdoor Use?
Set lights 1.8–3 meters apart along the walkway. This spacing usually creates comfortable pools of light without wasting fixtures. I prefer measuring the path first, then testing two temporary lights at night. My first layout looked neat. It was not comfortable.
Choose a low-glare beam with a wide, downward spread, typically around 90–120 degrees. A shielded optic is more important than the angle alone. It keeps light away from eye level, windows, and neighboring properties. The Illuminating Engineering Society emphasizes visual comfort, uniformity, and controlled uplight in outdoor lighting guidance. CIE 150:2017 also addresses unwanted outdoor light and light trespass. These principles matter more than a bright specification sheet. The U.S. Department of Energy’s solid-state lighting reports show that LED efficiency has improved substantially, but efficiency cannot repair poor placement. A harsh beam still feels harsh.
Tips: Use warm light near 2700–3000 K for gardens and residential paths. Aim fixtures slightly inward, not directly across the walkway. Check the ground after rain; reflections can increase glare. Compare spacing at dusk, midnight, and before sunrise. Solar output often changes overnight. I still leave a little extra distance near bends, steps, and entrances, because perfect spacing is rarely perfect in real gardens.
How to Choose Solar Pathway Lights for Outdoor Use?
Recommended maximum spacing increases with beam width, while shielded, low-glare optics help keep light directed toward the path.
Use approximately 1.8–2.2 m spacing for a narrow 20° beam, 2.2–2.6 m for a medium 30° beam, and 2.6–3.0 m for a wide 45° beam. These planning values assume clear path edges, similar fixture output, and a low-glare shield or cutoff design. Confirm the final layout on site because tree cover, surface reflectance, and fixture height affect uniformity.
Related Posts
-
How to Choose the Best Outdoor Solar Lights?
-
Best Led Solar Lights Outdoor for 2026 What to Choose?
-
Empowering Global Trust: Premium Solar Street Lamps from Leading Chinese Manufacturers
-
Exploring the Benefits of Commercial Solar Lights for Sustainable Business Solutions
-
The Future of Sustainable Indoor Lighting with Best Solar Lights
-
Top 10 Benefits of Solar Powered Outdoor Lights for Your Garden